Multiple Portal Instances in Liferay
May 4, 2022
The benefit of virtual multiple portals consists of sharing several resources between the virtual portals. Rather than having one of these resources for each portal, all virtual portals use the same single instance of such a resource. This reduces the administrative cost and optimizes the resource usage. Typically, virtual portals share the following resources:
- Physical Server box.
- The JVM
- Portlets and other code fragments
With Liferay, it is quite easy to get this done. 8 steps to create virtual portal instance in Liferay:
1. Configure domain name into network host file
- Open hosts file as an administrator to edit
- C: → Windows → System32 → Drives → etc → hosts file.
- append 127.0.0.1 www.enprowess.com and save.
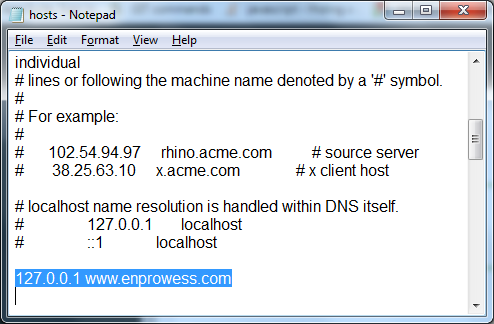
Figure 1: configuring domain name with system IP
2. Start the server and login as administrator
3. Navigate to Control Panel -> Configuration -> Virtual Instance
4. click the Add and configure domain name which is available on network host file
– first you would see the Liferay default instance as Liferay.com.
– when you try to add instance by clicking button, you would be on configuration page where you would fill-up form and click save such as:
Web ID* : EnProwess
Virtual Host* : www.enprowess.com
Mail Domain* : enprowess.com
Max User : as per your needs
Active : YES
– After save you would see two instance such as:
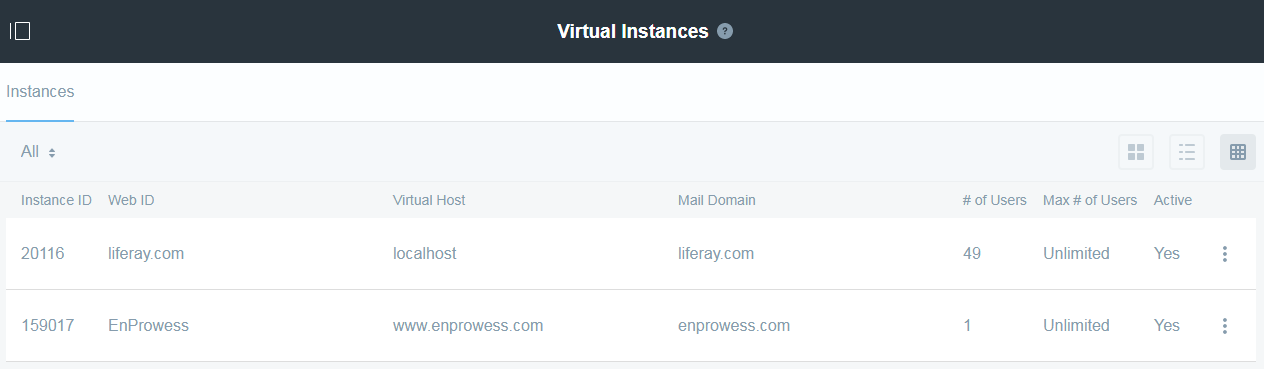
Figure 2: virtual instance list
5. See the virtual instance entry into Liferay local database

Figure 3: instance entry into virtualhost table
6. Access the URL: www.enprowess.com:8080 in browser
7. Login as test@enprowess.com with test password
8. Separate the property file for each portal instance
– you would refer //link of property file of each portal instance in Liferay 7
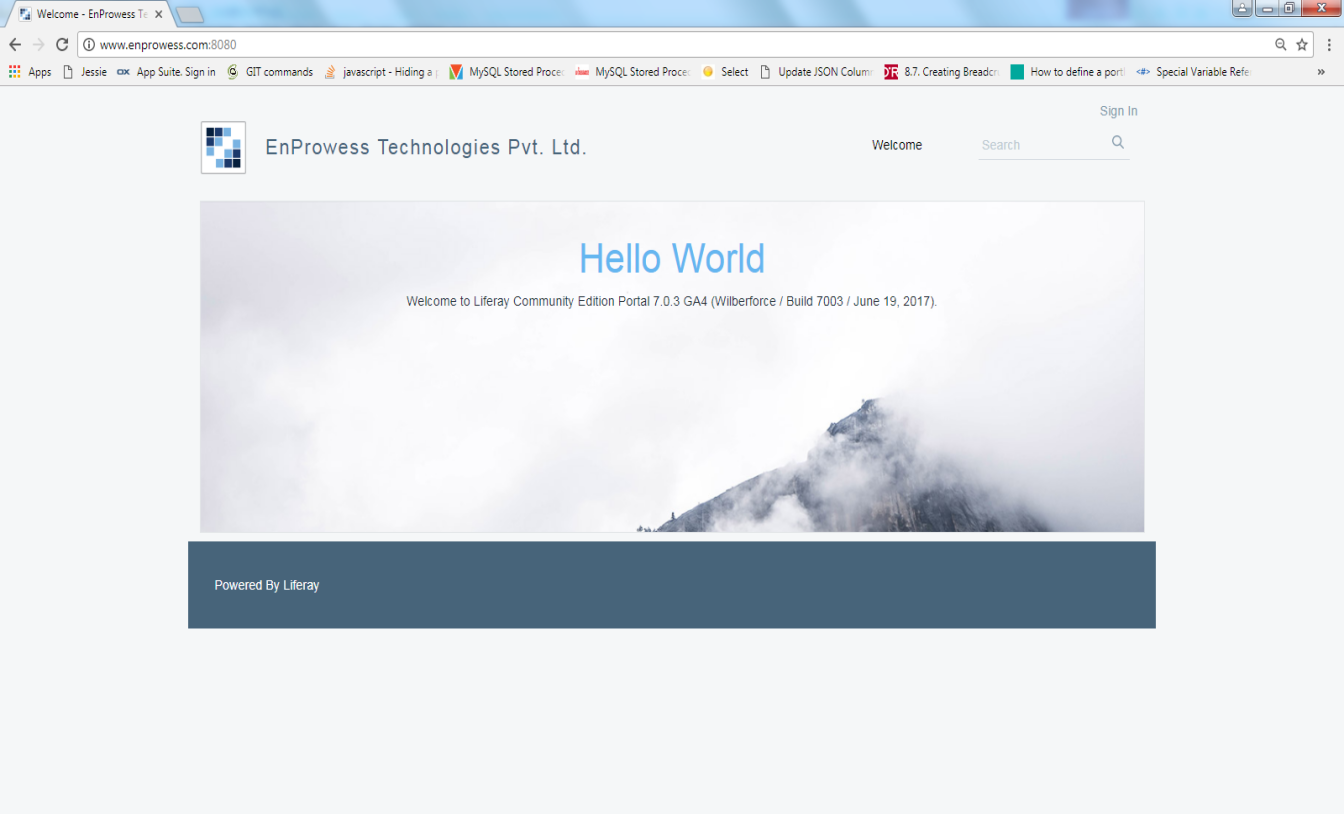
Figure 3: Fresh Liferay home screen
Now lets see separation between virtual portals of the portal resources. This means making portal resources available uniquely and separately to individual virtual portals and their users. Liferay allows us to create multiple properties file for each Liferay portal instance.
Lets see 4 steps to separate the properties file for each instance:
1. Create portal instance(virtual copy) properties file
– every virtual copy has webId while creation.
– you would create portal-<webId>-properties
– example : portal-EnProwess-properties
2. Place these file into server class path
– \tomcat-8.0.32\webapps\ROOT\WEB-INF\classes\Your file
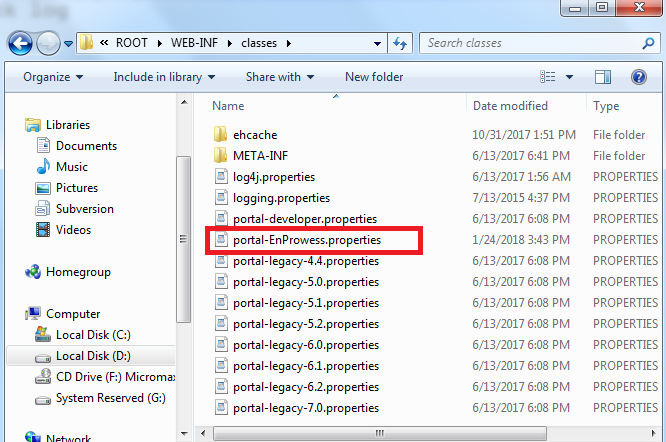
Figure 1: portal instance property
3. Set system property company-id-properties with value true
– you would place -Dcompany-id-properties=true in setenv.bat file
– path : \liferay-ce-portal-7.0-ga4\tomcat-8.0.32\bin\setenv.bat
– set “CATALINA_OPTS=%CATALINA_OPTS%
-Dfile.encoding=UTF8 -Djava.net.preferIPv4Stack=true -Dorg.apache.catalina.loader.WebappClassLoader.ENABLE_CLEAR_REFERENCES=false -Duser.timezone=UTC
-Dcompany-id-properties=true
-Xmx1024m -XX:MaxPermSize=384m -XX:+UseG1GC”
4. Restart the server and check log
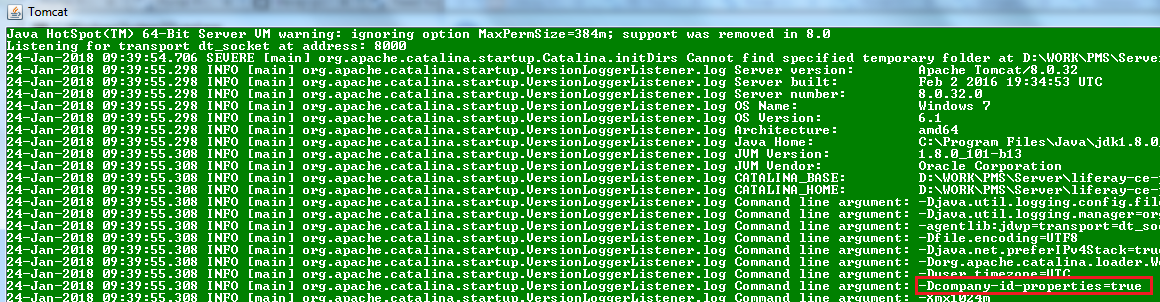
– check entry at starting point of server start for system property
Figure 2: system property to load portal instance
– check entry at ending point of server start for portal instance property
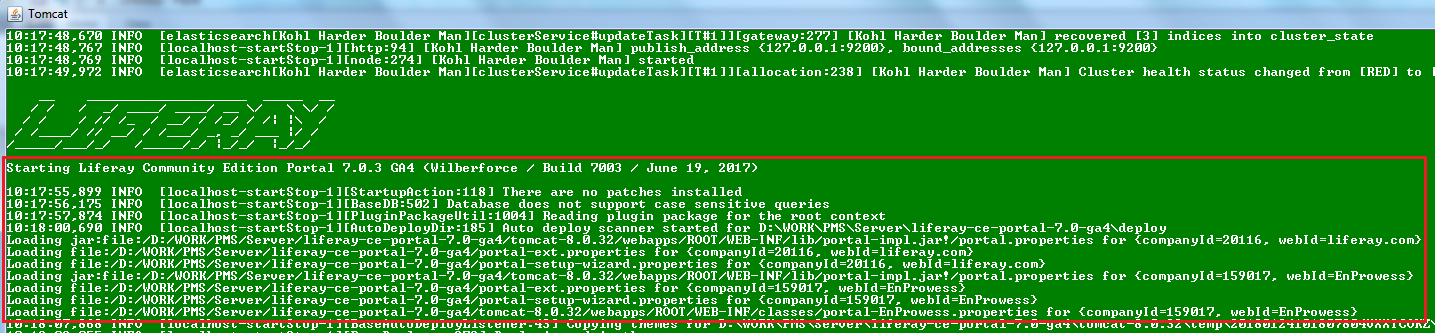
Figure 3: instance property file to be loaded
Note : To check difference you would place different property into both file. Ex: enable/disable terms.of.use.required=true/false.
Post By,
Manish Luste