RECAPTCHA on Custom page with Liferay 7 / DXP
April 28, 2022
CAPTCHA stands for Completely Automated Public Turing test to tell Computers and Humans Apart. It is mainly used to detect whether the end user is human or machine.
There has been always issues solving captcha as it generates complex image with along with text, many a times, it’s not clearly even visible. So, Google introduced a new way – reCAPTCHA – as they says “Easy on Humans, Hard on bots”.
With Liferay 7, reCAPTCHA comes out of the box for registration and forgot password functionalities and moreover it gives support to reCAPTCHA for any custom implementation.
To use reCAPTCHA with Liferay 7 portal, very first thing required is to get “reCAPTCHA Keys” and then enable it.
1. Get reCAPTCHA Keys.
-
Go to Google reCAPTCHA site by clicking here. You will see a Get reCAPTCHA button at the top-right corner. It will redirect you on Google reCAPTCHA Admin page.

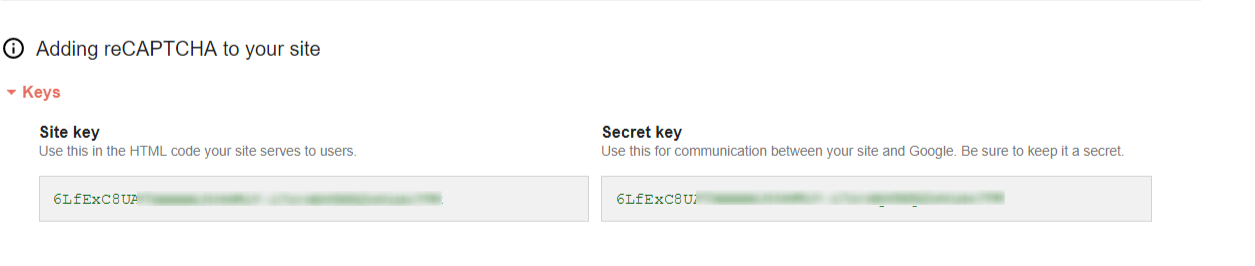
Provide appropriate name e.g. ”Liferay ReCaptcha”, and add your domain e.g. ”localhost”.
Once registered, you will get Site key and Secret key as shown in below image
2. Enable reCAPTCHA.
-
Since you have got reCAPTCHA keys, you are all set to enable it in Liferay by following below steps as an admin user.
Go to Liferay > Control Panel > Configuration > Server Administration > CAPTCHA as shown in below:
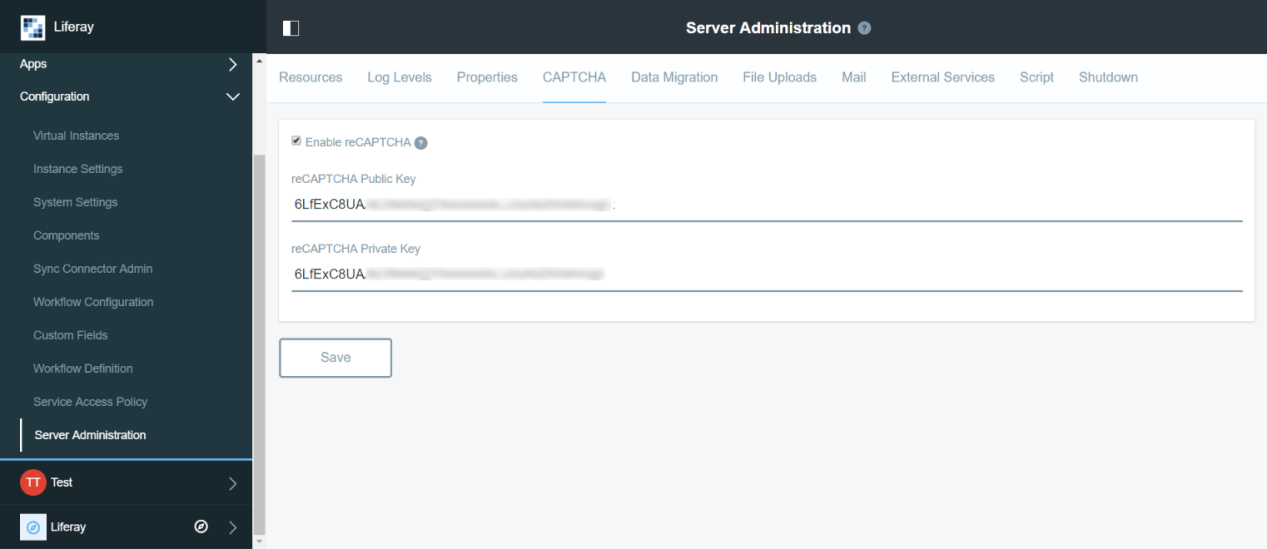
Provide Site key to reCAPTCHA Public Key and Secret key to reCAPTCHA Private Key fields, and then Save.
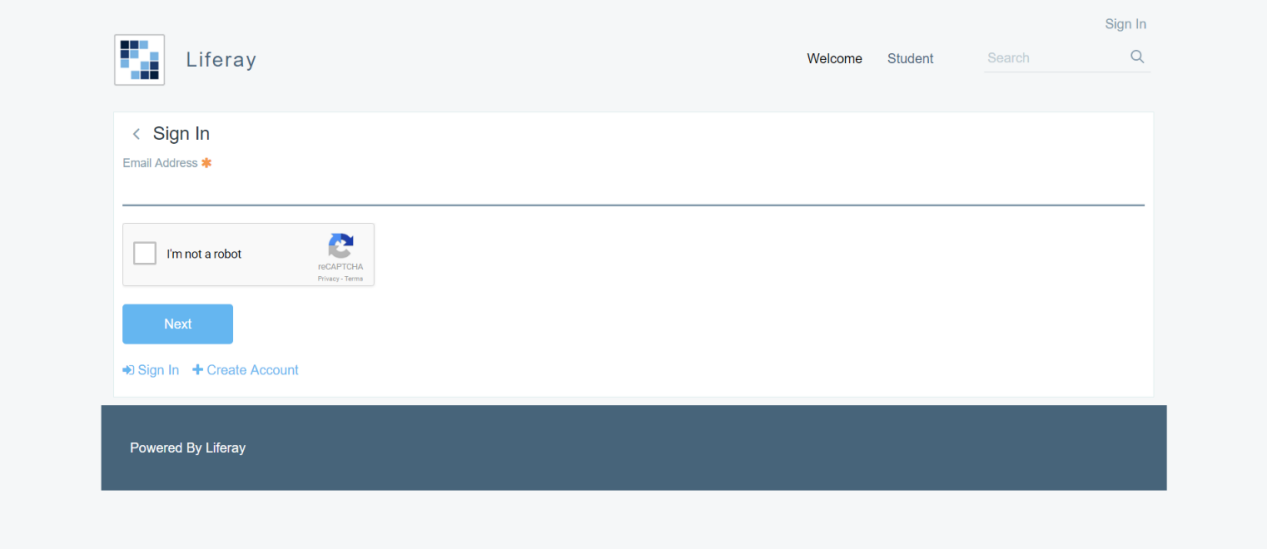
Now, Logout from Liferay and go on Create Account page. You can see a default Liferay captcha is replaced with the new Google reCAPTCHA.
Similarly, now go on Forgot Password page and you will see a new Google reCAPTCHA in place of default Liferay captcha view as shown in below image:
That was piece of cake, right?? Now, let’s Configure reCAPTCHA in Custom Portlet.
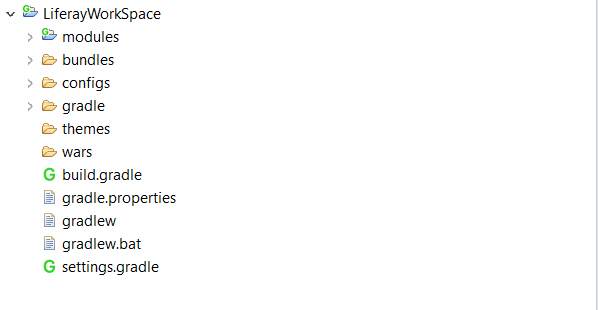
1. To create a Liferay workspace in ide follow the following steps:
-
File Menu ->New-> Select Liferay workspace
Upon creation of the workspace, the structure should look like below
2. To create custom module in ide follow the following steps
-
File Menu -> New->Click on Liferay Module Project. Fill up the detail as follow,
Project Name: Enter appropriate name e.g :”HumanTest ”
Project Template Name: Select :”mvc-portlet”
3. Important block of code for view.jsp
<portlet:actionURL var=“validateURL” windowState=“normal” name=“/recaptcha/userValidate”/>
<aui:form action=“${validateURL}“ method=“post” name=“fm”>
<div>
<liferay-ui:captcha url=“${captchaURL}“ />
</div>
<aui:button-row>
<aui:button type=“submit” />
</aui:button-row>
</aui:form>
4. Create Resource Request For reCAPTCHA
-
doServerResource method will use for generating reCAPTCHA image.
protected void doServeResource(ResourceRequest resourceRequest, ResourceResponse resourceResponse) {
try {
CaptchaUtil.serveImage(resourceRequest, resourceResponse);
} catch (IOException e) {
e.printStackTrace();
}
}
5. Create Action Request For reCAPTCHA check:
-
doProcessAction method will use for validating the reCAPTCHA entered/selected by user.
protected void doProcessAction(ActionRequest actionRequest, ActionResponse actionResponse) {
try {
CaptchaUtil.check(actionRequest);
} catch (CaptchaException e) {
if (e instanceof CaptchaTextException || e instanceof CaptchaMaxChallengesException) {
SessionErrors.add(actionRequest, e.getClass(), e);
}
}
}
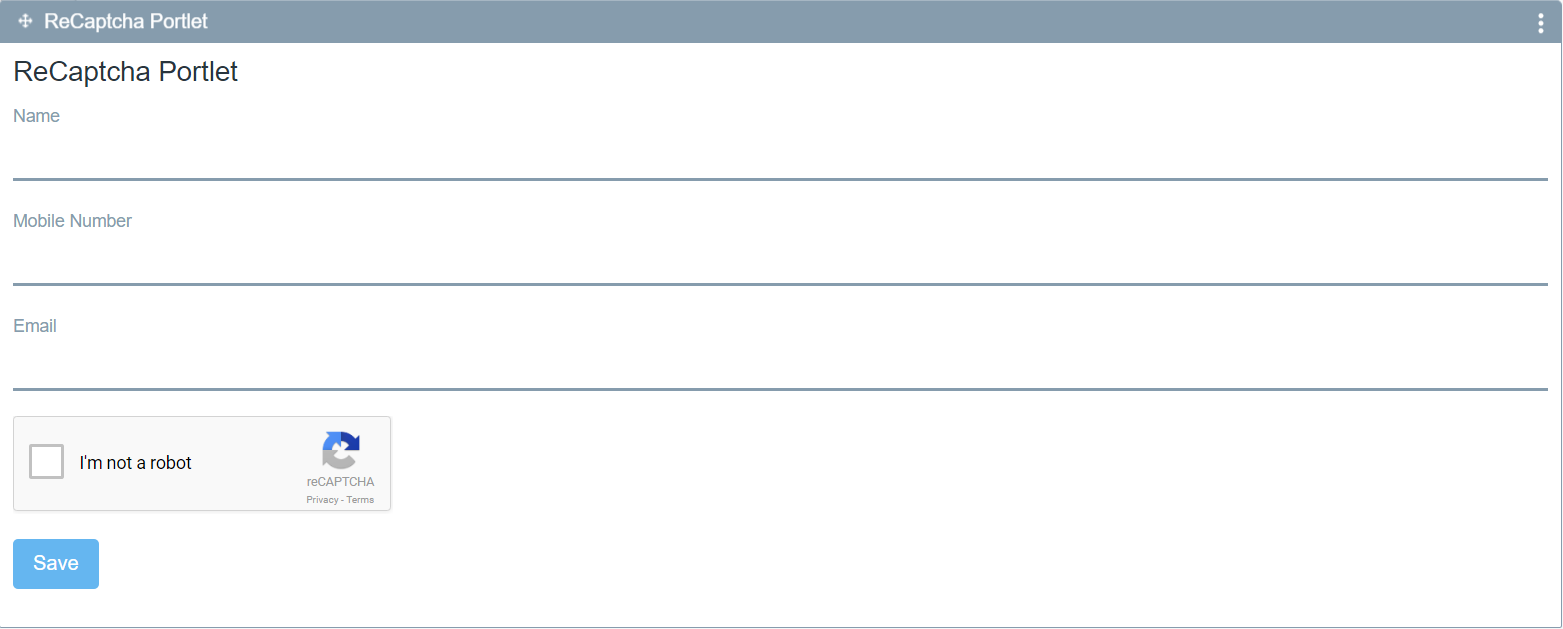
6. Output:
Hope this help!!
Post by,
Sejal Patel